 ||||
||||
||||
||||
Measure the volume of a liquid in a container using a distance sensor.
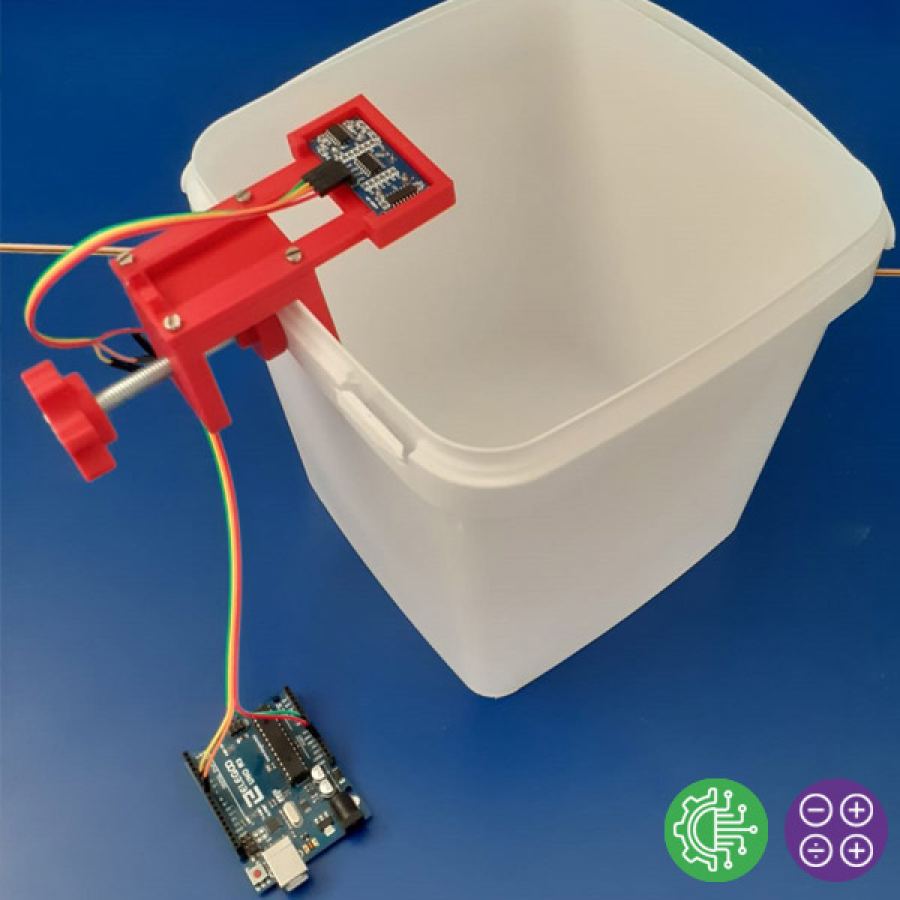
Do you want to discover how much liquid is filling a container? You can use a distance sensor, like a HC-SR04, connected to an Arduino and writing a short code you will calculate the amount of liquid volume starting by the container dimensions and using the distance measured by the sensor.
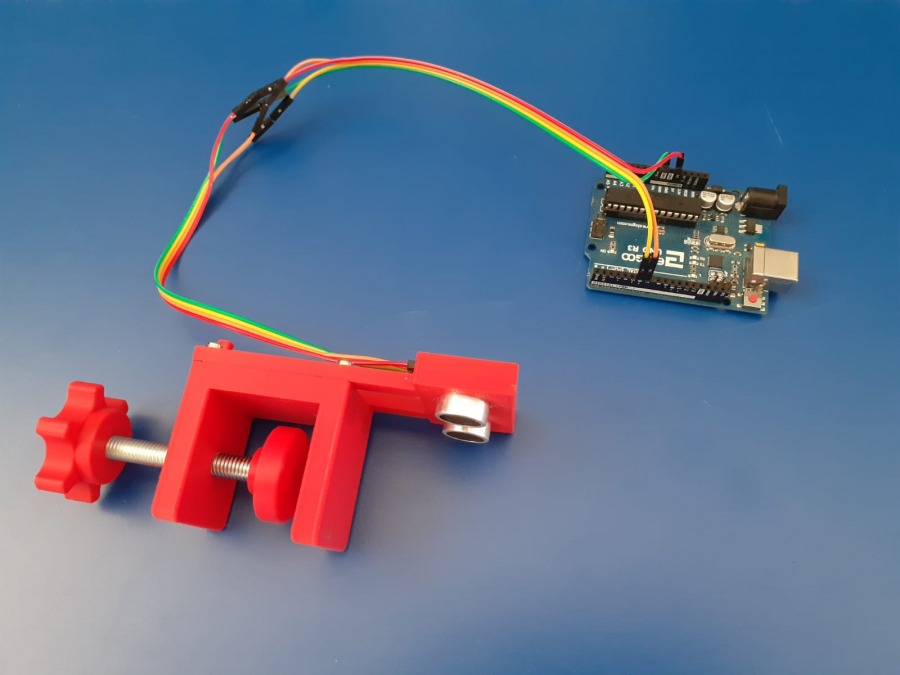
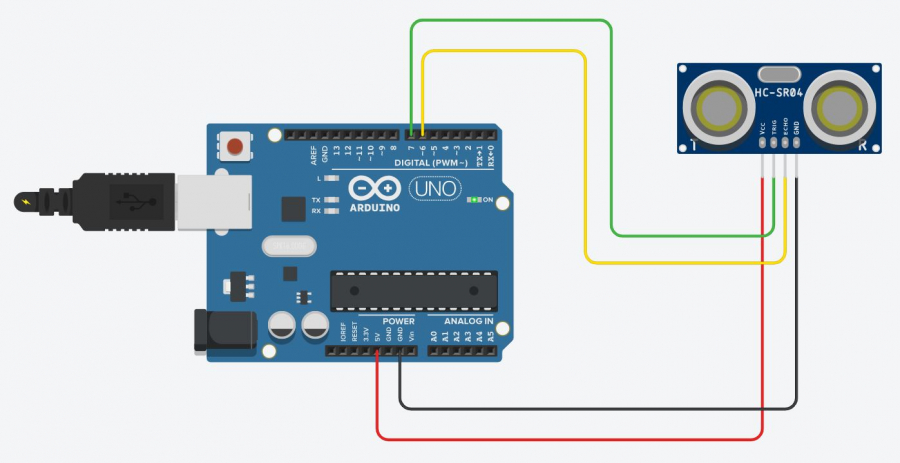
To start with this project you can find here the electrical diagram and an example of the Arduino code. You can also build a support for the sensor or use the 3d printable clamp available here!
- Arduino (449 Downloads)
- STL for 3D printer (zip file) (707 Downloads)
- STP for 3D cad (zip file) (760 Downloads)
Additional Info
-
What you will learn:
- Math:
- - practice with the calculation of the volume of solid bodies.
- Engineering:
- - wire electronic circuit following a simple diagram
- Technology:
- - arduino programming using float variables, math operators and external libraries.
-
Expected Time:
5-10 h
-
Materials & Recycled Materials:
- - 1x Arduino board (e.g. Arduino Uno)
- - 1x Distance sensor (e.g. HC-SR04)
- - Dupont Cables
- - Different type of containers (R)
For the optional sensor clamp:
- - Printable filament (e.g. PLA)
- - 1x M8x60 exagonal head screw
- - 4x M3x10 screws
-
Guide:
- 1. Following the available electrical diagram, connect the distance sensor HC-SR04 to the Arduino Board.
- 2. Install the sensor on the top side of the container you want to measure
- 3. Include the HCSR04.h library in the Arduino IDE (in the repository is called “HCSR04 ultrasonic sensor” by gamegine). This library will manage the sensor giving you as a result the distance between the sensor and the surface of the liquid to be surveyed, in the variable HCSR04.dist(). The distance is returned in centimetres, so we will work in centimetres, square cm and cubic cm.
- 4. Declare the needed variables as floating type so you can manage easily decimal numbers. You need to have variables to declare the container height, the area of the container base and to store some partial result as the distance from the sensor and the liquid surface and the liquid height, and to store the final result, the liquid volume
- 5. In the Setup, using the Serial.begin command, start the serial communication in order to print whatever you need on the serial monitor
- 6. In the Loop, at first you need to read the distance from the sensor. The liquid height will be calculate as the difference between the container height and the distance read by the sensor.
- 7. Always in the Loop, you have to calculate the liquid volume using your knowledge about the volume calculation of solid bodies, consider that now you know the area of the container base and the height of the liquid!
- 8. Using print commands, write on the Serial Monitor the result
- 9. Insert a delay at the end of the loop, to execute your program for example each second
- 10. Upload the program in the Arduino Board and have fun!
If you want to use also the sensor clamp that we suggest in the project, you have to print all the pieces with a 3d printer and assembly them following the short instruction video. Pay attention: if your sensor is not a HCSR04, you have to modify the Sensor Support draw to adapt it.
-
Further Steps:
If you want more fun you can:
- - Start from the linear dimensions (eg. The container diameter if the container base is circualr) and use the Arduino program to calculate the surface base
- - Use the specific weight of the liquid to calculate its real weight
- - Use different kinds of sensor to reach the same result
-
External Links:
How the HC-SR04 sensor works
-
Software used in the project:
- - Autodesk Fusion360
- - Arduino IDE
- Difficulty level: Easy
- Developed By: Apro Formazione - IT
WARNING! If you add a comment you accept the privacy policy!